Merchants: 6-Step Setup to Accept Avalanche (AVAX) Payments
Step-by-step setup for merchants to accept Avalanche (AVAX) payments. Choose hosted, embedded, or API integration, use auto convert or custodial...
CryptoPayrSep 19, 202610.00 min read
Merchants: 6-Step Setup to Accept Avalanche (AVAX) Payments
Yes, merchants can accept Avalanche (AVAX) payments today, and most get there through a payment gateway rather than building wallet infrastructure from scratch. The fastest path is a hosted checkout with auto-conversion to a stablecoin or fiat currency, which removes price risk the moment a payment lands. Custodial settlement and native stablecoin acceptance are the other two real options, and which one fits depends on how much crypto exposure your treasury wants to carry.
TL;DR:
Most merchants use payment gateways with auto-conversion to stablecoins or fiat to eliminate price risk during AVAX transactions.
Avalanche’s quick finality of one to two seconds and lower network fees reduce checkout friction compared to older blockchains.
Accepting USDC on Avalanche allows merchants to bypass volatility entirely, with stablecoin settlement supported through dedicated APIs and integrations.
Starting with a hosted checkout and full auto-conversion is recommended for initial AVAX acceptance, with more complex API integrations only justified by higher volume.
Merchant security and compliance involve verifying webhook signatures, understanding VASP obligations, and establishing reconciliation and dispute procedures before going live.
Cryptopayr
Accept More Crypto Payments
CryptoPayr helps businesses accept over 110 cryptocurrencies, including Avalanche, through a user-friendly payment gateway with minimal fees.
Why Avalanche Is a Practical Payments Chain for Merchants
Avalanche’s C-Chain settles transactions with finality in roughly one to two seconds, according to Avalanche’s own web3 payment stack documentation. That speed matters at checkout because it cuts the number of confirmations a merchant needs to wait for before marking an order paid. Slower chains force a choice between risking a double-spend or making the customer stare at a loading screen. Avalanche mostly sidesteps that tradeoff.
Transaction fees on the network also run lower than on many older blockchains, which matters more than it sounds like it should. A merchant processing thousands of small transactions a month feels network fees directly, either absorbed into margin or passed to the customer as friction.
Native USDC support on Avalanche adds the other piece. Avalanche’s documentation on stablecoin settlement describes onboarding APIs, point-of-sale integrations, and merchant dashboards built specifically around C-Chain stablecoin flows. That means a merchant doesn’t have to choose between “accept AVAX” and “avoid volatility.” Both can happen in the same integration.
How Avalanche (AVAX) Payments Work in a Merchant Flow
The mechanics look a lot like any modern payment flow, just with a blockchain instead of a card network in the middle. Here’s the sequence most gateways run:
The customer reaches checkout, and the merchant system creates an order with a payment amount in fiat.
The gateway generates a payment address (or QR code) and a locked exchange quote, typically valid for 15 to 20 minutes to protect against price swings during checkout, a standard practice gateway providers describe.
The customer sends AVAX from their wallet to that address.
The gateway watches the Avalanche network for confirmations, with the confirmation count usually configurable by the merchant.
Once confirmed, the gateway fires a webhook or API notification, and the merchant’s system fulfills the order automatically.
Settlement happens one of two ways: auto-convert the AVAX to a stablecoin or fiat immediately, or hold it as crypto for the merchant to reconcile and convert later.
That last step is where merchants make the decision that shapes everything else about how the integration feels operationally. Auto-convert means your finance team never has to think about AVAX price charts. Custodial holding means more manual reconciliation, but it also means you keep upside if AVAX moves in your favor between receipt and conversion.
Reducing Price Volatility and Friction: Auto-Conversion, Stablecoins, and Gas Abstraction
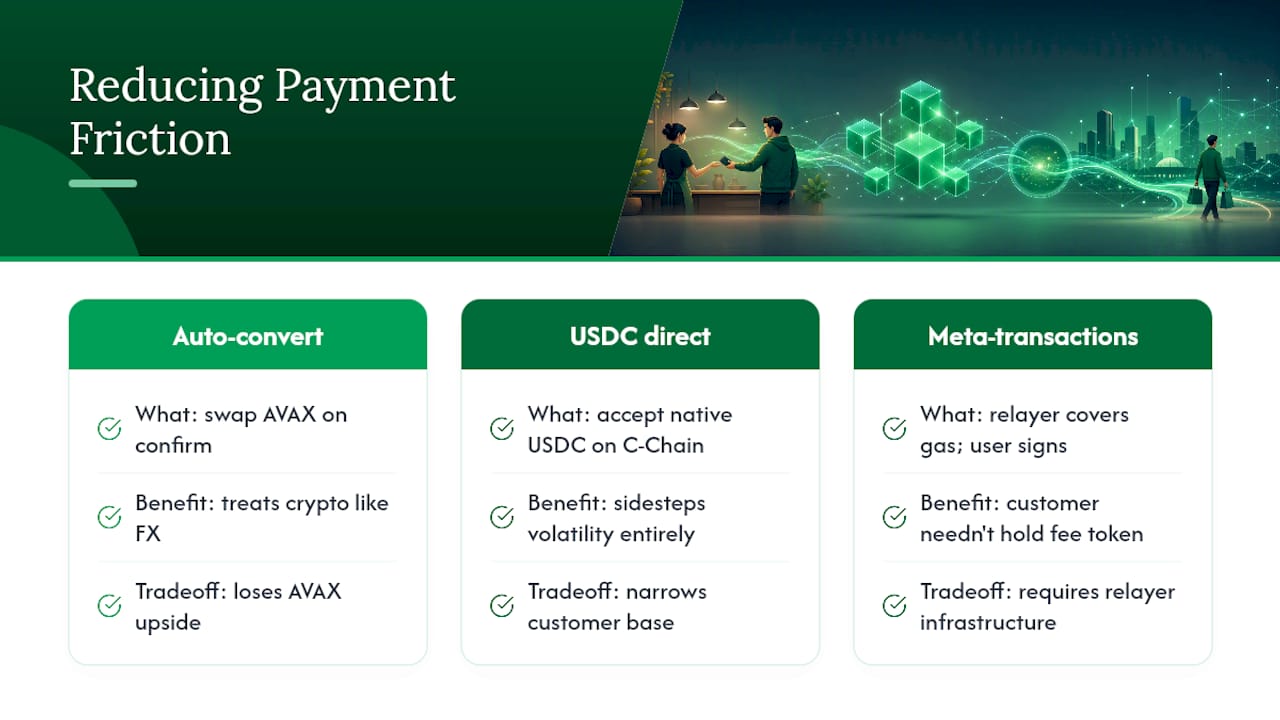
Three tactics handle most of the friction merchants run into with crypto payments, and you don’t need all three at once.
Auto-convert on receipt. The gateway immediately swaps incoming AVAX into USDC, USDT, or fiat the moment a payment confirms. This is the default most merchants should start with, because it treats crypto acceptance the same way a currency exchange desk treats foreign cash: convert and move on.
Accept native USDC directly. Avalanche’s own tooling supports compliant stablecoin settlement on C-Chain, so customers who already hold USDC can pay without touching AVAX at all. This sidesteps volatility entirely rather than managing it after the fact.
Use meta-transactions to hide gas. Avalanche’s payment-stack guidance describes relayer-based meta-transactions that let a relayer cover gas costs while the customer just signs their intent to pay. That means your customer never needs to hold a separate token to cover network fees, which is one of the biggest silent conversion killers in crypto checkout.
Pro Tip:If your treasury team is nervous about holding crypto on the balance sheet even briefly, start with 100% auto-convert to a stablecoin. You can always shift a percentage to custodial holding later once you’ve seen a few months of transaction volume and comfort with the reconciliation process.
The tradeoff across all three: auto-convert costs you any upside from AVAX price movement, custodial holding adds reconciliation work, and stablecoin-only acceptance narrows your customer base to people already holding stablecoins.
Integration Options and Step-by-Step Technical Checklist
Three integration patterns cover almost every merchant situation, and gateway providers generally describe them the same way: hosted checkout, embedded widget, or REST API.
A hosted checkout page is the fastest to launch, since the gateway handles the entire payment UI and you just redirect the customer. An embedded widget keeps the customer on your site while the gateway still manages the payment logic behind the scenes. A REST API gives you full control over the checkout experience but requires the most development time, and it’s worth checking whether the provider offers SDKs and sandbox environments before committing to this route.
Here’s the practical sequence for getting live:
Choose your integration pattern based on developer bandwidth and how much UI control you need.
Set up a merchant account and complete any required verification documents, then request sandbox credentials.
Build the order creation call that generates a payment request, and render the QR code or address with a visible fiat equivalent and expiry countdown.
Wire up webhook listeners for confirmation and settlement events, and connect them to your order fulfillment logic.
Run full end-to-end tests in sandbox, replaying webhook events to confirm your reconciliation reports match expected settlement amounts.
Switch API endpoints to production and monitor the first batch of live transactions closely before scaling volume.
Combining an embedded widget with relayer-based meta-transactions produces the smoothest customer experience, though it adds backend orchestration work and a dependency on relayer infrastructure. For a first launch, that complexity usually isn’t worth it. Start simpler, then optimize once you understand your actual transaction patterns.
Security, Compliance, and Operational Checklist for Merchants
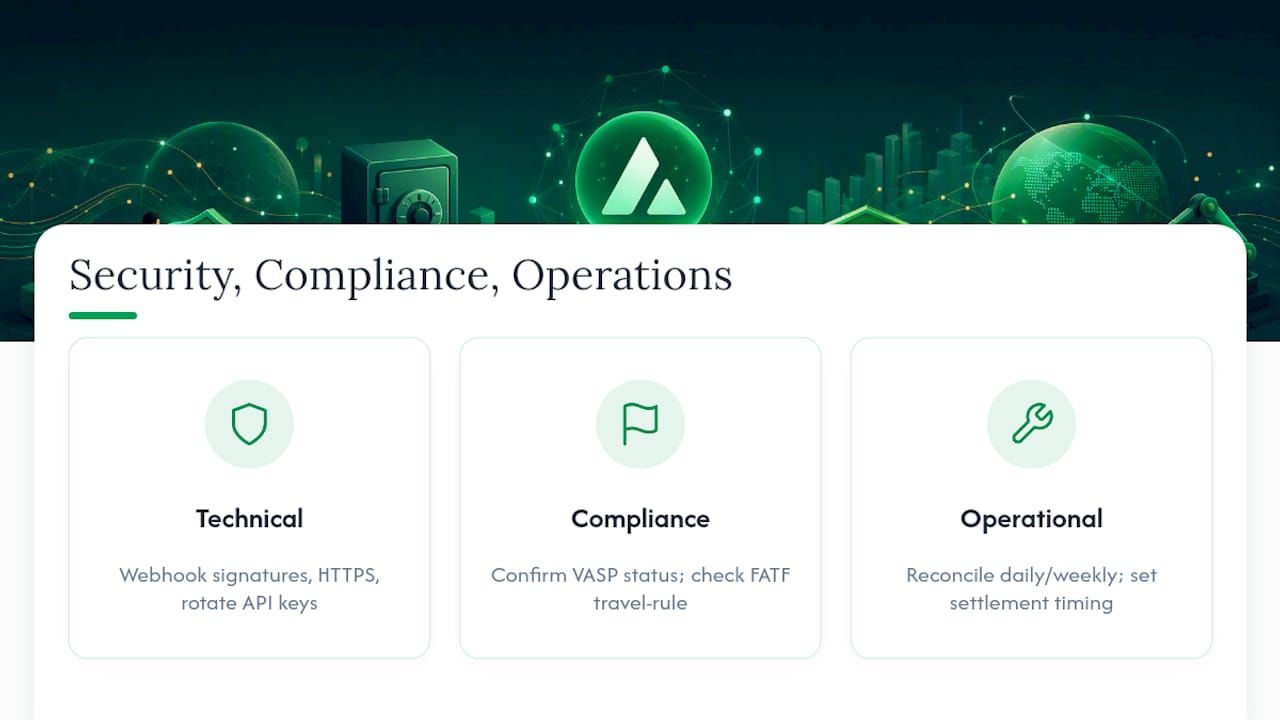
Three categories of risk need attention before you flip AVAX acceptance to production.
On the technical side, verify webhook signatures on every incoming notification, enforce HTTPS everywhere, store API keys in a secrets manager rather than in code, and rotate keys on a schedule rather than never.
On compliance, understand that many gateways and service providers qualify as Virtual Asset Service Providers (VASPs) and fall under FATF travel-rule obligations for information sharing on larger transactions. Confirm your gateway’s compliance posture for the jurisdictions where you operate, since requirements vary by country and by transaction size.
Operationally, decide your reconciliation cadence upfront, whether that’s daily or weekly, and settle on a clear settlement timing policy so finance knows exactly when converted funds hit your bank account. Also plan for how you’ll handle on-chain payment disputes, since blockchain transactions don’t have a chargeback mechanism the way card payments do. A custodial versus non-custodial comparison is worth reading before you lock in a settlement strategy, since that choice affects your dispute-handling options later.
When Accepting AVAX Actually Pays Off for Your Business
Marketplaces and cross-border sellers get the most out of AVAX acceptance, mostly because their customers are already comfortable moving value across borders without a bank in the middle. Crypto-native products, gaming platforms, and SaaS tools with a technical user base tend to see the highest adoption too, since their customers already hold wallets.
For everyone else, a conservative rollout works better than diving in headfirst: start with a hosted checkout and full auto-conversion, watch three or four months of transaction data, and only expand into API integration or custodial holding once volume and treasury comfort actually justify the extra complexity. Rushing straight to a custom API build before you know whether your customers even want to pay in AVAX is the most common mistake merchants make with crypto payments generally, not just with Avalanche specifically.
— Dustin
Turn On AVAX Acceptance Without the Compliance Runaround
Some crypto payment gateways offer AVAX acceptance with quick setup times and no setup or monthly fees. AVAX and native USDC support come standard, alongside auto-conversion to your stablecoin or fiat of choice, so the settlement decision this guide walks through is a toggle, not a development project.
You get hosted checkout, an embedded widget, and a full API with webhook support, so whichever integration pattern fits your team, it’s already built. Onboarding skips traditional KYC requirements, which means less paperwork between you and your first live transaction. Fees start at 0.1% for high-volume merchants under the Enterprise tier, with Standard, Growth, and Scale tiers scaled below that depending on your monthly volume, and a flat $0.10 per-payment option is available too through the payment gateway.
Check live AVAX rates, test the flow in sandbox, or head to the main gateway page to start enabling AVAX on your store today.
Sources
For deeper technical detail, Avalanche’s own documentation on its payment stack and stablecoin settlement layer covers the infrastructure side. For a general primer on how crypto payment gateways work, that overview applies broadly across chains. Developers building integrations may also find value in reviewing general ecommerce payment integration patterns.
Can I Accept AVAX Payments Without Holding Cryptocurrency?
Yes. Set your gateway to auto-convert every incoming AVAX payment to a stablecoin or fiat currency immediately on confirmation, which is the setup most merchants use to avoid price exposure entirely.
How Long Does an AVAX Payment Quote Stay Valid?
Most gateways lock the exchange rate for 15 to 20 minutes to protect both merchant and customer from price movement during checkout. If the customer doesn’t complete payment within that window, they need a fresh quote.
Does Accepting AVAX Require KYC for My Business?
It depends on the gateway. Cryptopayr offers a no-KYC onboarding path, letting merchants start accepting AVAX without the document-heavy verification process typical processors require.
What Does It Cost to Accept AVAX Payments Through Cryptopayr?
Fees run from 2% under the Standard tier down to 0.1% at the Enterprise tier based on monthly volume, or a flat $0.10 per payment through the gateway, with no setup or monthly fees either way.
What Happens If a Customer Disputes an AVAX Payment?
Blockchain transactions don’t support chargebacks the way card networks do, so disputes get handled through refunds initiated by the merchant rather than reversals initiated by the customer’s bank. Clear refund policies and fast customer support matter more here than in card-based checkout.